
X (Twitter) MCP server
Postory MCPRun your X From your AI
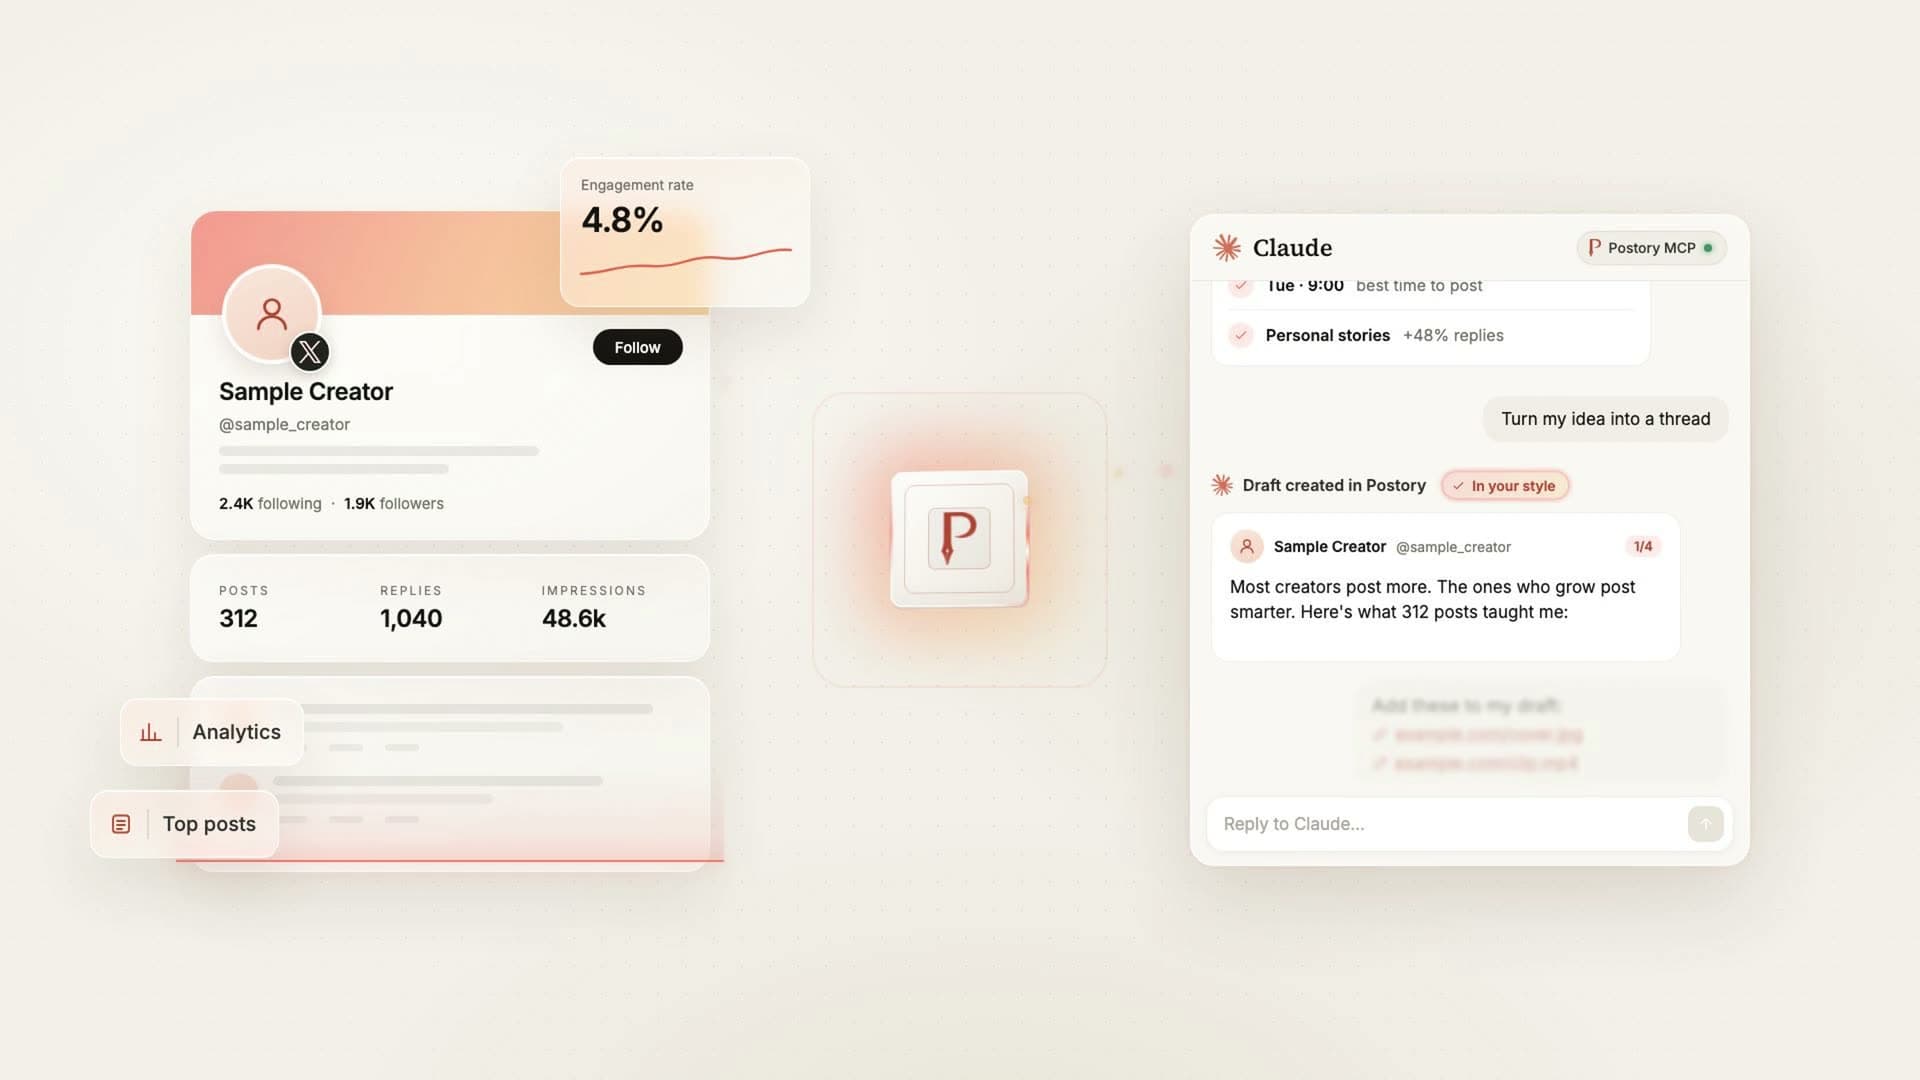
Connect Claude, ChatGPT or a compatible MCP client to read and analyze your X data, manage drafts, and schedule or publish posts.
100 free credits · no card required
Works with X
What your AI can do
Talk to your X data.
Post from your AI.
This connects your AI to your Postory account, not to X directly. Your AI reads the X data you imported into Postory. When it posts, Postory publishes through X’s official API. Your AI never gets your X password or tokens, and every post goes through the same flow as scheduling or publishing it in the Postory app.
Read your X data
Your imported posts and replies, who you follow and who follows you. Get a summary of how your posts did over the last 7 to 90 days: engagement, your best and weakest posts, the day and hour your posts did best, and the change from the period before.
“Which of my posts got the most replies last month?”
Ask your AI things like
- “Find my posts about pricing.”
- “How did my posts do this month compared with last month?”
- “How do I usually reply to posts like this one?”
- “Who do I follow that doesn’t follow back?”
Create and edit drafts
Create, edit, archive and delete drafts and threads in Postory. Add images or a video from a public link.
“Turn this idea into a thread in my style.”
Ask your AI things like
- “Write 3 posts based on my most-liked post last year.”
- “Add this image to my draft: [link].”
- “Show my drafts from this week.”
- “Delete my draft about the launch.”
Publish, schedule and reply
Publish or schedule drafts to X, see what’s queued, cancel a scheduled post. Answer the replies people left on your posts once they’re imported: your AI writes one answer to each in your voice and sends up to 10 at a time, a minute apart. It saves a post as a draft first, and nothing goes out until you say yes in the chat, or approve it in Postory if you turn that on.
“Schedule this draft for tomorrow at 9am.”
Ask your AI things like
- “Publish this draft now.”
- “What’s scheduled this week?”
- “Cancel Friday’s post.”
- “Answer my new replies in my voice.”
Check reach and audit accounts
Run a shadowban check, a Profile Audit, a Shadowban Recovery scan or a Following Cleaner check on one of your connected X accounts or any public X handle, and a shadowban check on a Threads handle. Your AI shows the price and asks you first. The Following Cleaner check only checks — it never unfollows anyone.
“Is my account shadowbanned?”
Ask your AI things like
- “Run a recovery scan on my account and walk me through the plan.”
- “Audit @handle’s profile and tell me what to fix first.”
- “Which accounts I follow are inactive or restricted?”
- “Check this Threads handle for a shadowban.”
Plan your content calendar
List your calendar tasks and what falls due, create or update a task, pause or resume it, and delete it when you ask. A task is a reminder — it never posts anything.
“Remind me to post a thread every Monday at 9am.”
Ask your AI things like
- “What’s on my content calendar this week?”
- “Add a task to reply to 10 posts every weekday.”
- “Pause my Friday task for now.”
- “Delete the launch reminder.”
- 1
Connect your X account to Postory
Sign up, then connect X on the Accounts page.
Go to Accounts - 2
Import your X dataOptional
To let your AI read and search your posts, replies, following and followers, import them into Postory first. Turn on Auto-update to keep them fresh. Imports and updates cost credits. Skip this if you only want to manage drafts and publish or schedule posts in Postory.
Go to Accounts - 3
Connect your AI to Postory’s MCP
Add the Postory MCP server in your AI app with the guides below and approve access. Then ask your AI to read your data, write drafts, and schedule or publish posts.
Choose your AI
Choose your AI
Claude
Anthropic
Claude (web)
Add Postory as a custom connector in your Claude account.
- Open Customize → Connectors.
- Click "+", then "Add custom connector".
- Paste
https://postory.io/mcpas the remote MCP server URL. Leave OAuth Client ID and Secret blank. - Click "Add", then sign in to Postory and approve access.
- In a chat, open "+" → "Connectors" and enable Postory.
Try it first
After connecting, ask:
In Claude, the same jobs are ready-made prompts: open the “+” menu in the chat box and pick one from Postory.
Good to know
- Available on Free, Pro, Max, Team and Enterprise. Free accounts can add one custom connector.
- On Team and Enterprise, an owner must first add Postory under Organization settings → Connectors → Add → Custom → Web. Members then select Connect in Customize → Connectors.
Documentation
Claude Help Center — Get started with custom connectors using remote MCP · Checked 2026-09-13.
Claude Desktop
Uses the same connectors as claude.ai. If Postory is already connected there, enable it in your conversation.
- Open Customize → Connectors in the desktop app.
- Click "+" → "Add custom connector".
- Paste
https://postory.io/mcpand click "Add". - Approve the scopes on the Postory consent screen that opens in your browser.
- Enable Postory per conversation from the "+" button → "Connectors".
Try it first
After connecting, ask:
In Claude, the same jobs are ready-made prompts: open the “+” menu in the chat box and pick one from Postory.
Good to know
- On Team and Enterprise, an owner must add Postory to the organization before members can connect. Free accounts can add one custom connector.
Documentation
Claude Help Center — Get started with custom connectors using remote MCP · Checked 2026-09-13.
Claude Code
Your agent can help with setup. You approve sign-in.
Add Postory from the terminal, then sign in through your browser.
- Run the add command below.
--scope usermakes Postory available in every project; drop it to keep the server in this project only. - Run
/mcpinside Claude Code and choose Authenticate — or runclaude mcp login postory— and approve the consent screen that opens in your browser. - Back in
/mcp, Postory should read ✔ Connected.
claude mcp add --transport http --scope user postory https://postory.io/mcp
claude mcp login postory{
"mcpServers": {
"postory": {
"type": "http",
"url": "https://postory.io/mcp"
}
}
}Try it first
After connecting, ask:
Good to know
- If you use the project
.mcp.jsonoption, approve the server when Claude Code first asks to trust it.
Documentation
Claude Code docs — Connect Claude Code to tools via MCP · Checked 2026-09-13.
ChatGPT & Codex
OpenAI
ChatGPT (web)
Enable developer mode to add Postory as a custom app.
- Open Settings → Security and login and turn on Developer mode.
- Open Plugins, select the plus button and create a developer-mode app.
- Name it Postory, enter
https://postory.io/mcpand choose OAuth. If asked for a registration method, choose Dynamic Client Registration (DCR). - Sign in to Postory and approve access.
- In a chat, open the Plus menu → Developer mode and select Postory.
Try it first
After connecting, ask:
Good to know
- Available on the web with Plus, Pro, Business, Enterprise and Education accounts.
- Workspace administrators may need to enable developer mode and permission to create custom MCP connectors.
Documentation
OpenAI — ChatGPT Developer mode · Checked 2026-09-13.
ChatGPT desktop app
Add Postory in Settings. This configuration is also used by Codex CLI and the IDE extension.
- Open Settings and select MCP servers.
- Select Add server.
- Enter a name, choose "Streamable HTTP" and paste
https://postory.io/mcpas the URL. - Save the server, then select Restart.
- In the server list, select "Authenticate" next to Postory and approve the scopes.
- Type /mcp in the composer to reach the connected servers.
Try it first
After connecting, ask:
Documentation
ChatGPT Learn — Model Context Protocol (desktop) · Checked 2026-09-13.
Codex CLI
Your agent can help with setup. You approve sign-in.
Add Postory by URL, then sign in through your browser.
- Run the add command below.
- Run
codex mcp login postoryand approve the consent screen in your browser. - Start Codex; the Postory tools show up in its tool list.
codex mcp add postory --url https://postory.io/mcp
codex mcp login postory[mcp_servers.postory]
url = "https://postory.io/mcp"Try it first
After connecting, ask:
Good to know
- Codex CLI, the ChatGPT desktop app and the Codex IDE extension share this configuration.
Documentation
ChatGPT Learn — Model Context Protocol (CLI) · Checked 2026-09-13.
Gemini
Gemini (web app)
Connect Postory as a custom app for Gemini Spark.
- On a computer, open gemini.google.com → Settings & help → Connected Apps. If needed, open Personal Intelligence first.
- Under "Custom apps for Spark", select the field to add a custom app link.
- Enter
https://postory.io/mcp, select "Next" and follow the prompts. Leave Advanced features unchanged. - Sign in to Postory and approve access.
- In a Gemini Spark prompt, type @ and select Postory.
Try it first
After connecting, ask:
Good to know
- Requires Gemini Spark access, a personal Google Account, Keep Activity on, age 18+ and a location in the US. Available in English only.
- Connect on the web first; then use the app in Gemini Spark on web or mobile.
Documentation
Gemini Apps Help — Connect & manage custom apps for Gemini Spark · Checked 2026-09-13.
Gemini CLI
Your agent can help with setup. You approve sign-in.
Add Postory from the terminal, then authorize it inside Gemini CLI.
- Run the add command below.
- Run
/mcp auth postoryinside Gemini CLI and approve the consent screen. - Run
/mcpto confirm the Postory tools are listed.
gemini mcp add --transport http --scope user postory https://postory.io/mcp
# then, inside Gemini CLI: /mcp auth postory{
"mcpServers": {
"postory": {
"httpUrl": "https://postory.io/mcp"
}
}
}Try it first
After connecting, ask:
Good to know
- The command saves Postory for every project. Use
--scope projectto save it for the current project only.
Documentation
Gemini CLI docs — MCP servers with Gemini CLI · Checked 2026-09-13.
Grok
xAI
Grok
Add Postory as a custom connector on grok.com.
- Go to grok.com/connectors.
- Click "New Connector", then select "Custom".
- Enter
https://postory.io/mcpas the MCP server URL and complete the authentication. - Approve the scopes on the Postory consent screen; Grok then discovers the tools and offers them in conversations alongside its built-in connectors.
Try it first
After connecting, ask:
Good to know
- On Grok Business and Enterprise, a team admin must first add Postory in console.x.ai → Grok Business → Connectors.
- These steps apply to grok.com. Setup in the mobile apps or inside X is unconfirmed.
Documentation
xAI docs — Grok Connectors · xAI docs — Connector Management (Business and Enterprise) · Checked 2026-09-13.
Grok Bot
Connection route not verified.
Postory setup is unconfirmed. Grok Bot documents catalog plugins, but no custom MCP URL setup.
Good to know
- Use Grok on grok.com or Grok Build with the setup guides on this page.
Documentation
xAI docs — Grok Bot · Cursor help — Connect plugins in Grok Bot · Checked 2026-09-13.
Grok Build
Your agent can help with setup. You approve sign-in.
Add Postory from the terminal, then sign in through your browser.
- Run the command below. Add
--scope projectto save it in the current repository. - Start
grok, open/mcps, select postory and pressito sign in. Approve access in Postory. - Run
grok mcp doctor postoryto check the connection.
grok mcp add --transport http postory https://postory.io/mcp[mcp_servers.postory]
url = "https://postory.io/mcp"Try it first
After connecting, ask:
Good to know
- Grok Build can also load Claude Code and Cursor MCP configurations. Run
grok inspectto check whether Postory is already configured. - The launch announcement lists early beta access for SuperGrok and X Premium+ subscribers.
Documentation
xAI docs — Grok Build MCP servers · xAI — Introducing Grok Build · Checked 2026-09-13.
Editors & other agents
Cursor, GitHub Copilot, Windsurf and OpenClaw
Cursor
Your agent can help with setup. You approve sign-in.
Add Postory to your MCP configuration and enable it in Customize.
- Merge the entry below into
~/.cursor/mcp.jsonfor all projects, or.cursor/mcp.jsonfor this project. - Open Customize in the sidebar and enable Postory.
- Complete the Postory sign-in when Cursor prompts you and approve access.
{
  "mcpServers": {
    "postory": {
      "url": "https://postory.io/mcp"
    }
  }
}
Try it first
After connecting, ask:
Documentation
Cursor docs — Model Context Protocol · Checked 2026-09-13.
VS Code (GitHub Copilot)
Your agent can help with setup. You approve sign-in.
Add Postory to VS Code and use it in agent chat.
- Merge the entry below into
.vscode/mcp.json. For all workspaces, use MCP: Open User Configuration from the Command Palette instead. - Run MCP: List Servers, select Postory and start the server. Approve the trust and sign-in prompts.
- Open agent chat and enable Postory in the tool picker.
{
  "servers": {
    "postory": {
      "type": "http",
      "url": "https://postory.io/mcp"
    }
  }
}
Try it first
After connecting, ask:
Documentation
VS Code docs — Use MCP servers in VS Code · Checked 2026-09-13.
Windsurf / Devin Desktop
Your agent can help with setup. You approve sign-in.
Use the Devin CLI setup for the default Devin agent, or the separate config below for legacy Cascade.
- For the default Devin agent, run the two commands below and approve access in your browser.
- For legacy Cascade, merge the JSON below into
~/.codeium/windsurf/mcp_config.json. - In Cascade, open Settings → Cascade → MCP Servers, refresh the list and complete the Postory sign-in when prompted.
devin mcp add -s user postory https://postory.io/mcp
devin mcp login postory{
"mcpServers": {
"postory": {
"serverUrl": "https://postory.io/mcp"
}
}
}Try it first
After connecting, ask:
Good to know
- The Devin command saves Postory for all projects. Cascade uses a separate configuration and sign-in.
- Team settings may restrict MCP servers; Enterprise users must enable MCP in settings.
Documentation
OpenClaw
Your agent can help with setup. You approve sign-in.
Add Postory with OAuth enabled, then sign in through your browser.
- Run the two commands below.
- Open the authorization URL and approve access in Postory.
- Run
openclaw mcp doctor postory --probeto verify the connection.
openclaw mcp add postory --url https://postory.io/mcp --transport streamable-http --auth oauth
openclaw mcp login postory{
mcp: {
servers: {
postory: {
url: "https://postory.io/mcp",
transport: "streamable-http",
auth: "oauth",
enabled: true,
},
},
},
}Try it first
After connecting, ask:
Good to know
- If the browser cannot reach the callback, finish with the --code command printed by OpenClaw.
- An existing Gateway or agent may need its configuration reloaded before Postory tools appear.
Documentation
OpenClaw docs — Connect MCP servers · OpenClaw docs — MCP commands and OAuth · Checked 2026-09-13.
Another app?
Any MCP client over streamable HTTP
Any other MCP client
Your agent can help with setup. You approve sign-in.
Use a client that supports remote Streamable HTTP and MCP OAuth with dynamic client registration.
- Add Postory as a remote (streamable HTTP) MCP server with the URL below.
- Let the client run the OAuth flow. Postory registers clients dynamically, so there is no client ID or secret to create first, and no API key.
- Approve the permissions on the consent screen — drafts are always on; publishing, account data, and imports and paid checks are on by default and can be unticked, and imports and paid checks need account data.
https://postory.io/mcpTry it first
After connecting, ask:
Good to know
- A localhost URL works only for a client on that machine. For a hosted client, use
https://postory.io/mcpto connect to production. - A stdio-only client needs a bridge that also supports Postory’s OAuth sign-in.
Documentation
Model Context Protocol — Connect to remote MCP servers · Checked 2026-09-13.
Ask your coding agent for setup help
Paste this prompt into an agent with web and configuration access. Complete sign-in when prompted.
Already know your way around?
https://postory.io/mcpSign in with Postory. No API key needed.
Setup guides checked against provider documentation on 2026-09-13. App plans and availability vary.
Your account. Your controls.
Your AI connects to your Postory account, not to X. Postory sits between them: it holds your X connection and posts through X’s official API. Your AI never sees your X password or tokens.
Open AI apps- You approve publishing. By default your AI shows you the post and asks you in the chat before it publishes or schedules. Turn on “Manually approve publishing & scheduling in Postory” in settings to approve each one on a Postory page instead. It can also answer replies people left on your own posts — up to 10 in one batch, shown to you and approved the same way, in the chat or on the Postory page. There are no tools for likes, follows or DMs, and it cannot reply to someone else’s post.
- Paced posting and replying. Your AI can post to an X account at most once every 10 minutes and 30 times in any 24 hours, and never the same text twice within 24 hours. Replies have their own budget, counted separately: at most one a minute and 50 in any 24 hours per account. Posts and replies you send from the Postory app count too. These are hard limits with no override.
- Batches need your yes. Scheduling or cancelling several posts goes through a preview of the whole list that you confirm, up to 10 at a time — a second single schedule or cancel within 5 minutes is refused until you do. Archiving or deleting several drafts is confirmed the same way. Writing and editing drafts are not: a draft stays inside Postory until you publish it.
- Official X API. Posts go out through X’s official API from the X account you connected, the same way as posts you publish in the Postory app.
- You choose the permissions. Draft access is always on. Publishing, reading your imported account data, and “Imports and paid checks” (fetching data from X, shadowban checks, Profile Audits, Shadowban Recovery scans and Following Cleaner checks) are on by default, and you can turn any of them off.
- See and revoke access. The activity log records each AI app’s tool calls and keeps them for 180 days; a request rejected before a tool runs may not appear. You can change an app’s permissions or disconnect it at any time. Taking a permission away and adding one back both apply to the app’s next call, and disconnecting stops its tokens immediately.
- No X password or tokens shared. You sign in to Postory in your browser. Your AI app receives a Postory access token, but never your X password or X tokens.
A few good questions
Does this break X’s rules?
Postory publishes through X’s official API, and your AI asks for your approval before each delivery: in the chat by default, or on a Postory page if you turn that on. That does not guarantee compliance: the content and activity on your account must still follow X’s rules, including its restrictions on spam and duplicate posts. Read X’s automation rules.
What can my AI actually do?
Read and search your imported X posts, replies, following and followers; summarise how your posts performed and suggest posting times; create, edit, archive and delete drafts; attach images or a video; list, create, pause and delete content calendar tasks; and publish or schedule drafts after your approval. It can answer replies people left on your own posts — up to 10 at a time, previewed and priced first, sent only after you approve the batch. It can also check delivery status and cancel scheduled posts. With the “Imports and paid checks” permission it can fetch fresh posts, replies, following and followers from X into Postory, watch or stop an import and set auto-updates; a full import is priced and asks you first; refreshing out-of-date data runs on its own and tells you the credits spent. With the same permission it can check an X account — yours or any public handle — or a Threads handle for a shadowban (3 free checks a day, then 7 credits), and run a Profile Audit (150 credits), a Shadowban Recovery scan (150 credits) or a Following Cleaner check on an X account or public X handle, each priced and asked first. The Following Cleaner check never unfollows anyone. There are no tools for likes, follows or DMs, and it cannot reply to someone else’s post. Free shadowban test, no login.
What data can it read, and where does that data come from?
Your imported X history and rosters, plus drafts and scheduled posts in your Postory workspace. Choose what to import on the Accounts page, or, with the “Imports and paid checks” permission, ask your AI to bring in fresh data from X: a full import is priced and asks you first; refreshing out-of-date data runs on its own and tells you the credits spent. Drafting and publishing work without an import. MCP cannot fetch an arbitrary X account’s history. Import your data.
What does it cost?
Postory adds no MCP fee. Reading imported data and managing drafts use no Postory credits. Imports and auto-updates cost credits: posts and replies are charged per item saved, following and followers per account fetched, even one already stored. A charged run costs at least 1 credit, and a run that never reached X costs nothing. One import takes up to 1,000 posts, 1,000 replies and 5,000 accounts per following or followers list. A metrics refresh costs 0.05 credits per post or reply it re-reads (at least 1, at most 10 each for posts and replies). The performance summary, posting slots and voice profile are free. Publishing costs 3 credits per account per delivery. A shadowban check is free 3 times a day, then 7 credits for the full tests; for your own account a Profile Audit costs 150 credits and a Shadowban Recovery scan 150, and both cost more for a public handle; a Following Cleaner check is priced by how many accounts it checks. Each shows the price and asks first. Calendar tasks use no credits. New accounts receive 100 free credits. Your AI provider may require a paid plan or charge separately. See pricing.
What permissions does an AI app get?
Draft access is always on. Publishing, reading your imported account data, and “Imports and paid checks” (fetching data from X, shadowban checks, Profile Audits, Shadowban Recovery scans and Following Cleaner checks) are on by default; untick any of them on Postory’s consent screen. Imports and paid checks need reading your account data, so unticking the one unticks the other. You can change them or disconnect an app on the AI apps page.
Can it post something without asking me?
Your AI is told to ask first: by default it shows you the post and asks you in the chat before publishing or scheduling. To approve each one on a Postory page instead, turn on “Manually approve publishing & scheduling in Postory” in settings. You can also pause AI access for all connected apps at once, without disconnecting them. Open AI apps.
Which networks does it work with?
The MCP tools work with X (Twitter): your connected X accounts, and any public X handle for the paid checks. The one exception is a shadowban check of a Threads handle.
Control your social with your AI
Connect your account, then read, analyze, draft, schedule and publish — all from the AI you already use.
100 free credits · no card required